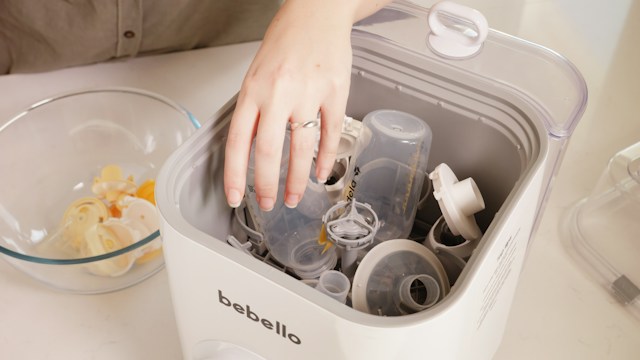
Quick answer: A baby bottle steriliser needs descaling when you notice white, chalky residue inside the unit, a cloudy film on bottles after cycles, reduced steam output, longer cycle times, or a musty smell. Limescale buildup is most common in hard water areas and can affect how well the steriliser kills bacteria, so regular descaling—typically every 2 to 4 weeks—keeps it working properly.
Keeping your baby’s bottles sanitized is one of those tasks that quietly shapes your daily routine. You probably run your steriliser multiple times a day, trusting it to do its job without a second thought. But like any appliance that uses water and heat, a steriliser can develop limescale buildup over time, especially if you live somewhere with hard water.
Limescale isn’t just an eyesore. It can interfere with heating elements, reduce steam production, and in some cases, create an environment where bacteria linger instead of being eliminated. The good news is that spotting the warning signs early is straightforward once you know what to look for. This guide walks through the clearest indicators that your baby bottle steriliser needs descaling, why the buildup happens in the first place, and how to clean it safely so it keeps protecting your little one.
What Causes Limescale Buildup in a Baby Bottle Steriliser?
Limescale forms when water containing dissolved minerals—mainly calcium and magnesium—is heated repeatedly. As the water evaporates during the sterilizing process, it leaves these minerals behind as a hard, chalky deposit. Over time, this residue accumulates on the heating element, the base of the unit, and any surface the water touches.
Households in hard water regions will notice this buildup much faster than those with soft water. If you’ve ever seen a white crust form inside a kettle, you’ve already seen limescale in action—a steriliser works the same way, just on a smaller and more frequent scale because it’s used so often during the early months of a baby’s life.
Signs Your Baby Bottle Steriliser Needs Descaling
White or Chalky Residue Inside the Unit
The most obvious sign is visible residue. Open the lid of your steriliser and look at the base, the walls, and any removable trays. If you see a white, powdery, or crusty layer, that’s limescale. This buildup often starts around the heating element since that’s where water is most concentrated and heated most intensely.
Cloudy or Spotty Film on Bottles After Cycles
If your bottles come out of a cycle looking cloudy or covered in tiny white spots, limescale is likely the cause. Mineral deposits can transfer from the steam onto the plastic or glass surfaces, leaving a film that doesn’t wash off easily with regular dish soap. Parents often mistake this for a dishwashing issue when it’s actually a sign the steriliser itself needs attention.
Reduced Steam Output
A momcozy sterilizer relies on steam reaching a high enough temperature to kill bacteria effectively. When limescale coats the heating element, it acts as an insulating layer, making it harder for heat to transfer into the water. You might notice less visible steam escaping during a cycle, or the inside of the unit feels less hot than usual when a cycle finishes.
Longer Cycle Times
Related to reduced steam output, a sterilising cycle that used to take a set amount of time but now seems to run longer—or needs to be restarted—can indicate the heating element is struggling to do its job. This is your steriliser working harder than it should, which isn’t great for its longevity either.
Unusual Noises During Operation
Some parents report a louder or different sound during sterilising cycles once limescale has built up. This happens because mineral deposits can disrupt the normal flow of water and steam, causing gurgling, knocking, or hissing sounds that weren’t there before.
A Musty or Mineral Smell
While sterilisers shouldn’t have a strong odor under normal conditions, heavy limescale combined with trapped moisture can sometimes create a musty or metallic smell. If you notice this, it’s worth checking the inside of the unit closely.
Visible Limescale Around the Water Reservoir
Many steriliser models have a dedicated water reservoir or fill line. Check this area specifically—limescale tends to ring around the waterline, similar to how a bathtub develops a ring after repeated use.
How Often Should You Descale a Baby Bottle Steriliser?
The right frequency depends largely on your water hardness and how often you use the steriliser. As a general guideline:
- Soft water areas: Descale every 4 to 6 weeks.
- Moderate hardness: Descale every 2 to 4 weeks.
- Hard water areas: Descale every 1 to 2 weeks, or even more frequently if you notice buildup forming quickly.
If you’re not sure how hard your water is, many water utility companies publish this information, or you can purchase an inexpensive water hardness testing kit. Choose more frequent descaling if you’ve noticed any of the warning signs above, since visible buildup usually means the process has already been underway for some time.
How to Descale a Baby Bottle Steriliser
Step 1: Unplug and Empty the Unit
Always start by unplugging the steriliser and allowing it to cool completely if it’s just been used. Empty any remaining water from the reservoir.
Step 2: Create a Descaling Solution
A common and effective method is mixing equal parts white vinegar and water. For units with more stubborn buildup, undiluted white vinegar can be used, though it’s worth checking your manufacturer’s instructions first since some materials or coatings may react differently to concentrated vinegar.
Step 3: Run the Solution Through a Cycle (If Applicable)
Some sterilisers allow you to run the vinegar solution through a standard cycle, letting the steam and heat help break down the limescale. Check your manual, as not all models are designed for this.
Step 4: Let It Soak
If running a cycle isn’t recommended, pour the solution into the reservoir and let it sit for 30 minutes to an hour. This gives the vinegar time to dissolve the mineral deposits without needing heat.
Step 5: Scrub Away Residue
After soaking, use a soft cloth or a non-abrasive brush to gently scrub away any remaining buildup. Avoid metal scouring pads, which can scratch the interior surfaces and create spots where bacteria could accumulate.
Step 6: Rinse Thoroughly
Rinse the reservoir and all surfaces multiple times with clean water to remove any vinegar residue. Leftover vinegar smell or taste can transfer to bottles if not rinsed properly.
Step 7: Run a Cycle With Clean Water
Before using the steriliser for actual bottles again, run one more cycle with plain water only. This helps confirm all vinegar has been flushed out and gives you a chance to check that steam output and cycle time have returned to normal.
Choose Distilled or Filtered Water If Limescale Builds Up Quickly
If you’re finding yourself descaling far more often than feels manageable, consider switching to distilled or filtered water for your steriliser instead of tap water. Distilled water contains virtually no minerals, so it won’t contribute to limescale formation at all. This is a particularly good option for families in hard water regions who want to reduce maintenance frequency. Choose filtered water if distilled isn’t readily available, as it still reduces mineral content compared to straight tap water, even if not as thoroughly.
Why Keeping Your Steriliser Descaled Matters
Limescale isn’t purely a cosmetic issue. When a heating element is coated in mineral deposits, it has to work harder to reach the same temperature, which means it may not reach the heat levels needed to properly sanitize bottles and other feeding equipment. Over time, this added strain can also shorten the lifespan of the appliance itself, leading to earlier replacement than necessary.
Beyond functionality, there’s also a hygiene consideration. Mineral deposits can create uneven surfaces where residue or bacteria might cling, rather than being washed away cleanly during each cycle. Regular descaling keeps both the appliance and the bottles it sanitizes in the condition they’re meant to be.
Keep Your Steriliser Running at Its Best
Staying ahead of limescale buildup doesn’t require a complicated routine. A quick visual check every week or two, paired with a regular descaling schedule based on your water hardness, is usually enough to keep your baby bottle steriliser functioning the way it should. If you start noticing cloudy bottles, reduced steam, or longer cycles, treat it as your cue to descale rather than waiting for the buildup to worsen.
A well-maintained steriliser means one less thing to worry about during a season of parenting that already comes with plenty on your plate.
Frequently Asked Questions
How long does it take to descale a baby bottle steriliser?
Most descaling methods take between 30 minutes and an hour, including soaking time, scrubbing, and a final rinse cycle. The exact time depends on how much buildup has accumulated and the descaling method your steriliser manufacturer recommends.
Can I use something other than vinegar to descale my steriliser?
Yes. Citric acid solutions are also commonly used and tend to leave less of a lingering smell than vinegar. Always check your steriliser’s manual first, since some manufacturers specify which descaling agents are safe for their materials.
Is it safe to use a steriliser with visible limescale?
It’s not recommended. Limescale can reduce the effectiveness of the sterilizing process by lowering steam temperature and creating surfaces where bacteria could potentially linger. Descale as soon as you notice visible buildup rather than waiting for a scheduled cleaning.
Will switching to distilled water stop limescale completely?
Distilled water contains virtually no minerals, so it significantly reduces or eliminates limescale formation. This makes it a practical long-term solution for households in hard water areas who want to minimize how often they need to descale.
How do I know if my steriliser’s heating element is damaged from limescale?
Signs include a steriliser that no longer heats up, takes significantly longer than normal to complete a cycle even after descaling, or produces unusual smells or noises that persist. If descaling doesn’t resolve these issues, the heating element may need professional inspection or replacement.